Mask production – step by step
1. Print the 3 pattern pieces for the mask and the pattern for the filter on A4 paper at 1/1 scale (real size)
2. Cut the pattern pieces with scissors
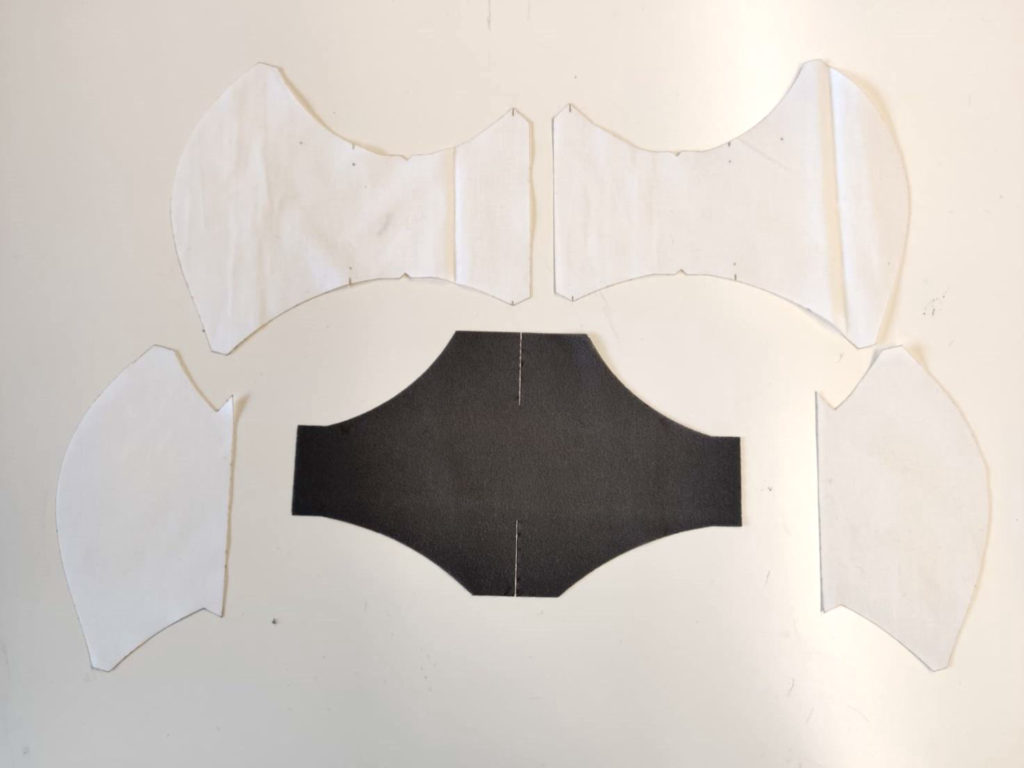
3. Trace the patterns on the corresponding fabric (4 pieces for the mask, 1 for the filter)
4. Cut the cloth for the mask and the filter (picture)
5. Cut the electric cable to length
6. Cut the elastic cords to length
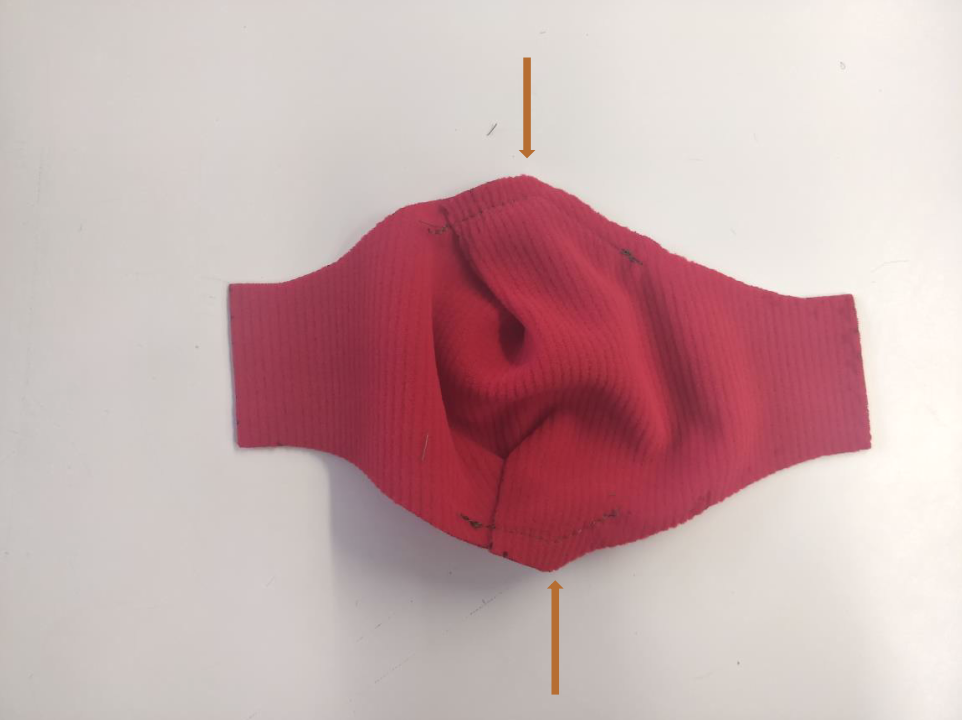
7. Fold and stitch the filter (picture)
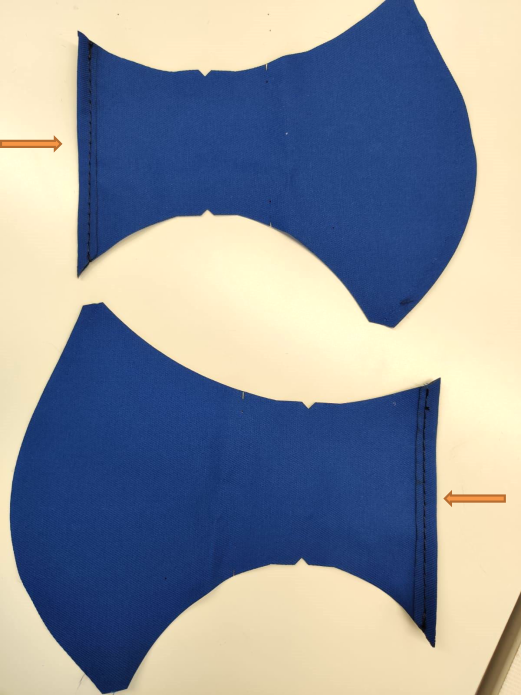
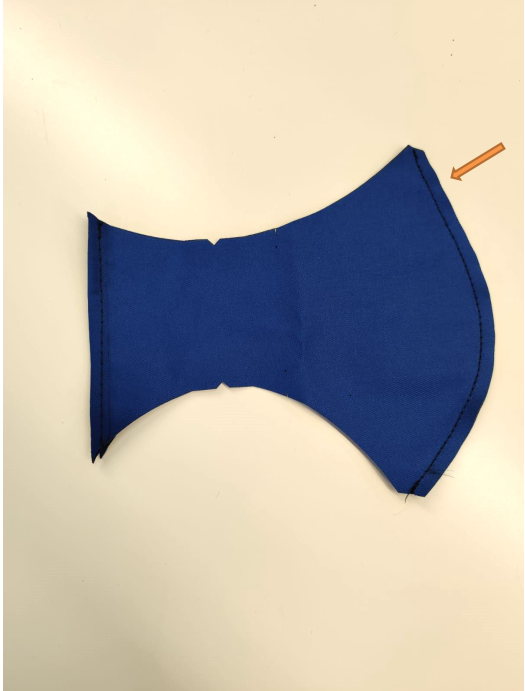
8. Fold and stitch short sides on the two large cloth pieces (picture)
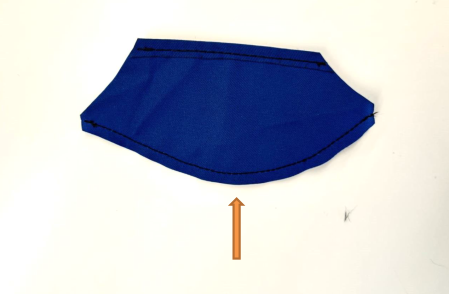
9. Assemble and stitch curved edges of the two large cloth pieces right sides together (picture)
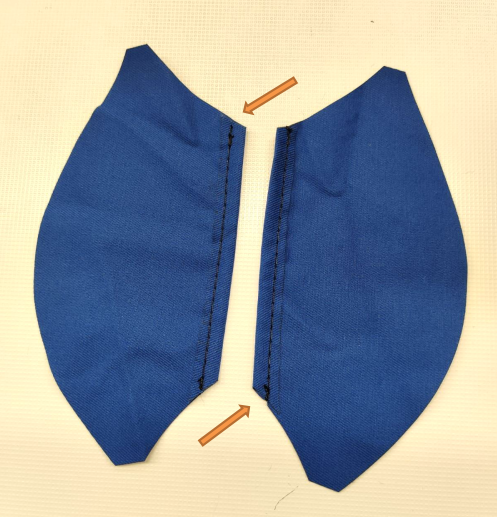
10. Fold and stitch short edges on the two small cloth pieces (picture)
11. Fold and sew together curved edges of the two small cloth pieces right sides together (picture)
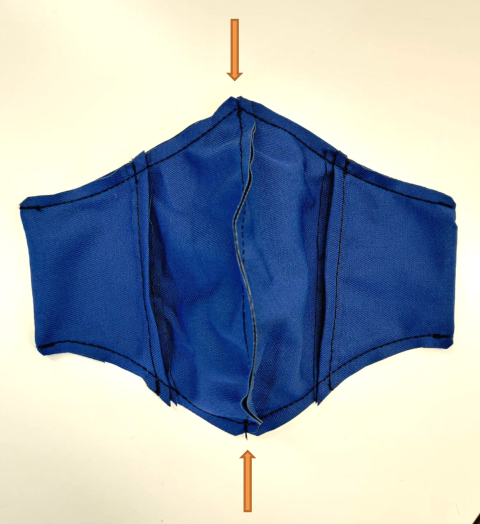
12. Flatten the two large pieces right side up, position the two small pieces wrong side up, fold the wings of the two large pieces, stitch together the upper and lower edges of the mask with overlapping folds (picture)
13. Turn the mask right side out, trace with a pencil two vertical lines between notches (pictures)

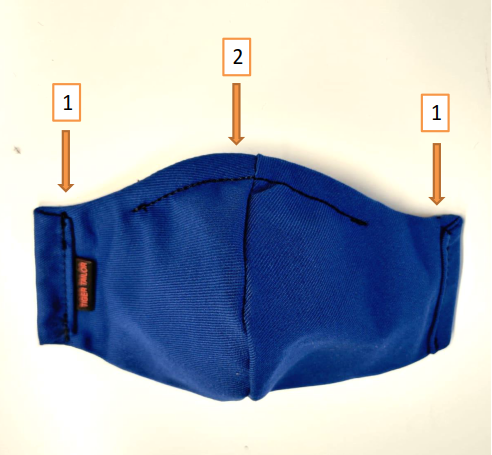
14. Fold wings to the lines and topstitch (1)
Topstitch a line 10mm (3/8”) between the points (electric cable tunnel) (2) (picture)
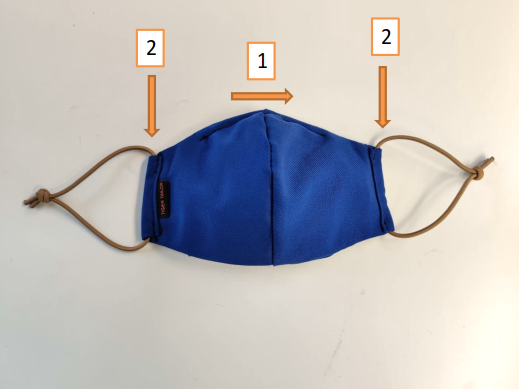
15. Insert the electrical cable in the tunnel from the inside of the mask (1)
Insert and tie the elastic cords in the tunnels (2) (picture)
16. Wash the mask and the filter at 140°F (60°C)
17. Insert and flatten the filter inside the mask
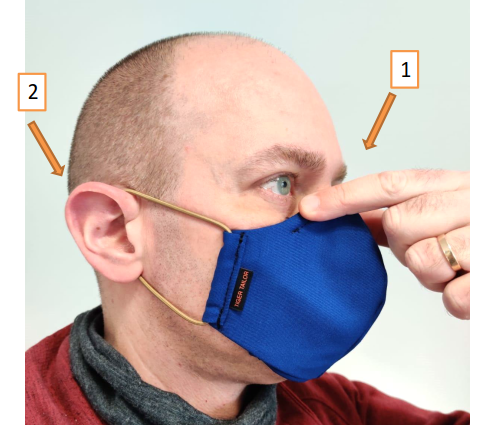
18. Position the mask over the face
19. Adjust the electric cable to the shape of the nose (1)
20. Place the elastic cords around the ears and adjust length by re-tying if necessary (2) (picture)